
Mastering Contouring and Highlighting: A Comprehensive Guide
Mastering Contouring and Highlighting: A Comprehensive Guide
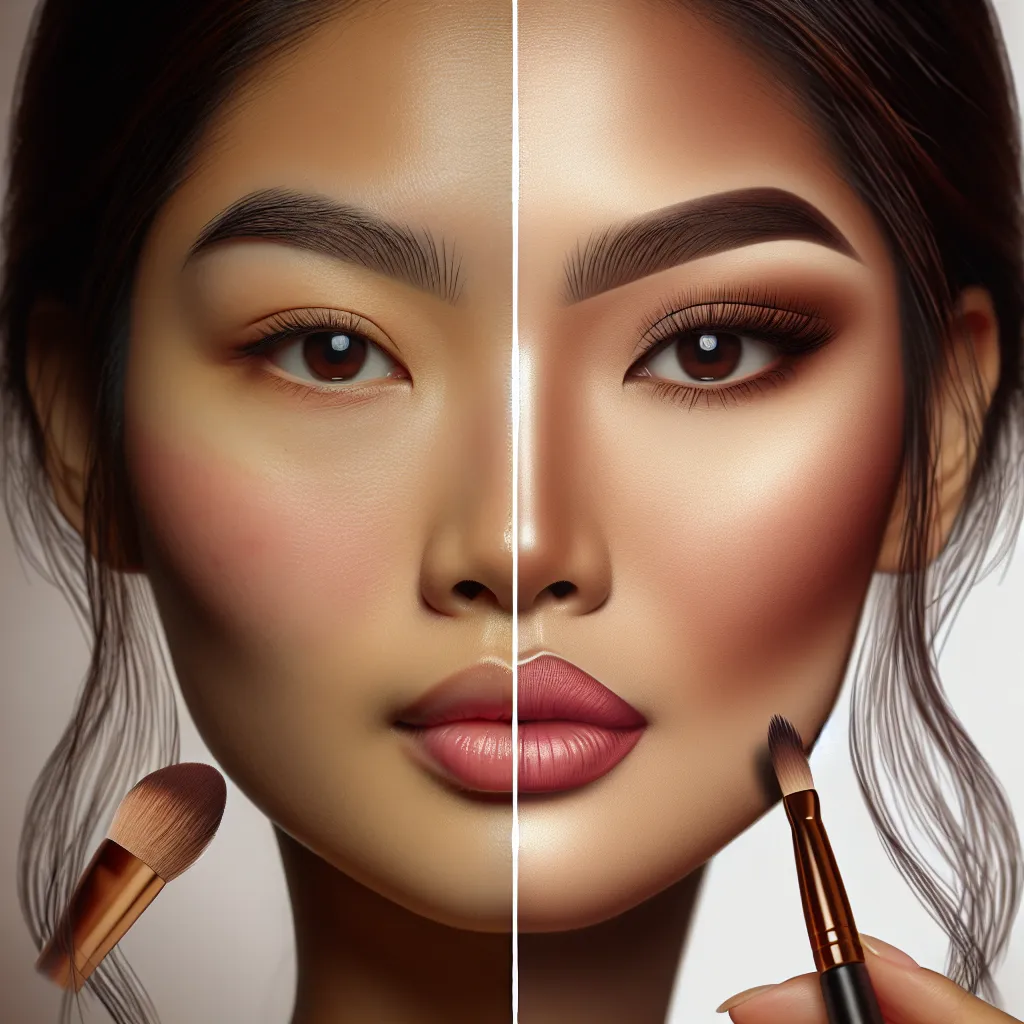
When it comes to mastering the art of contouring and highlighting, the tools you use are just as important as the techniques you employ. One of the key components to achieving flawless contouring and highlighting is the use of the right brushes. When focusing on the delicate contours of the eye area, it’s crucial to have a set of high-quality eye makeup brushes at your disposal.
Using the appropriate eye makeup brushes can make all the difference in creating seamless transitions and gradients in your eye contouring and highlighting. Whether you’re working with cream or powder products, having the right brushes can elevate your eye makeup game to the next level.
For precise placement and blending, a tapered blending brush can be a game changer. When it comes to detailed highlighting, a small, precise brush can ensure that you hit all the right spots with just the perfect amount of product. To get your hands on some top-notch eye makeup brushes, check out the range available at eye makeup brushes. With the right tools at your disposal, you’ll be well on your way to mastering the art of contouring and highlighting your eyes with finesse.
Mastering Contouring and Highlighting: A Comprehensive Guide
Mastering contouring and highlighting can completely transform your makeup look, adding dimension and enhancing your natural features. To achieve flawless results, it’s important to follow the dos and don’ts of contouring and highlighting. Here’s a comprehensive guide to mastering these techniques.
Do start with a clean, moisturized face before applying any makeup. This provides a smooth base for contouring and highlighting products. Don’t overdo it – the key to successful contouring and highlighting is to enhance, not to create a heavy, artificial look. Subtlety is key.
When choosing a contour shade, opt for a color that is one or two shades darker than your natural skin tone. This will create natural-looking shadows. For highlighting, select a shade that is one or two shades lighter than your skin tone to accentuate the high points of your face. Blending is crucial in contouring and highlighting. Use a beauty sponge or a brush to seamlessly blend the contour and highlight products for a seamless, natural finish.
Do consider your face shape when contouring. Different face shapes require different contouring techniques. For example, if you have a round face, focus on contouring the outer edges to create the illusion of more defined cheekbones. Conversely, if you have a square-shaped face, focus on softening the angles with strategic contouring and highlighting.
Avoid applying contour and highlight products too close to each other, as this can result in a muddy, unflattering appearance. Balance is key – remember to blend, blend, blend for a flawless finish. Lastly, always remember to set your cream/liquid contour and highlight products with a powder of the same shade to ensure long-lasting wear.
By following these dos and don’ts of contouring and highlighting, you can achieve a beautifully sculpted and radiant complexion. With practice and patience, mastering these techniques will become second nature, allowing you to enhance your natural beauty with confidence.
Contouring and Highlighting: Common Mistakes to Avoid
Contouring and highlighting are popular makeup techniques that can enhance your facial features and give you a sculpted, radiant look. However, when it comes to contouring and highlighting, there are common mistakes that many people make. Understanding these mistakes and how to avoid them is essential for achieving a flawless makeup finish.
One of the most common mistakes in contouring is using a contour shade that is too dark or warm for your skin tone. This can result in a harsh, unnatural look. It’s important to choose a contour shade that is only one or two shades darker than your natural skin tone and has a cool undertone to mimic the shadows on your face.
Another mistake is applying the contour product in a haphazard manner. Contouring should be strategic and tailored to your face shape. Applying the product too low on the cheeks or blending it too far down can create an unflattering effect. Instead, take the time to identify your unique face shape and apply the contour product accordingly.
When it comes to highlighting, using a product that is too shimmery or glittery can be a major misstep. While a subtle shimmer can add a beautiful glow, an overly sparkly highlighter can make the skin look oily or emphasize texture. Opt for a highlighter with a natural sheen that complements your skin tone.
Additionally, applying the highlighter to the wrong areas can detract from the overall effect. The high points of the face, such as the cheekbones, brow bone, and the bridge of the nose, should be the focus of the highlighting technique. Avoid over-highlighting areas with prominent texture, as this can accentuate any imperfections.
In conclusion, contouring and highlighting can be transformative when done correctly, but avoiding these common mistakes is crucial for achieving a seamless, natural-looking result. By selecting the right shades, applying products strategically, and choosing the appropriate finish, you can elevate your makeup game and showcase your best features.
Achieving the Perfect Contoured Look: Tips and Tricks
Contouring and highlighting has become a staple in makeup routines, allowing individuals to sculpt their face and enhance their features. Achieving the perfect contoured look requires attention to detail and an understanding of the dos and don’ts of this makeup technique.
One of the most important tips for achieving a flawless contoured look is to choose the right shade of contour and highlight products. When selecting a contour shade, opt for a product that is two shades darker than your natural skin tone. This will create a natural-looking shadow when applied to the hollows of the cheeks, the temples, and the jawline. Similarly, choose a highlight shade that is two shades lighter than your skin tone to accentuate the high points of the face, such as the cheekbones, the bridge of the nose, and the cupid’s bow.
Another key aspect of achieving the perfect contoured look is blending. Blending is essential to avoid harsh lines and create a seamless transition between the contour, highlight, and natural skin tone. Use a dense, angled brush for contouring and a soft, fluffy brush for blending to ensure a professional finish.
However, there are some common mistakes to avoid when contouring and highlighting. One of the most prominent don’ts is applying too much product. Over-application of contour and highlight products can result in a heavy, unnatural appearance. It is crucial to start with a small amount of product and gradually build up to the desired intensity, ensuring a subtle and refined contoured look.
Additionally, it’s important to be mindful of the placement of contour and highlight products. Avoid bringing the contour too close to the center of the face, as this can create a muddy effect. Similarly, be cautious when applying highlighter, as adding too much product can result in an overly shiny or greasy finish.
In conclusion, achieving the perfect contoured look requires careful consideration of product selection, blending techniques, and avoiding common mistakes. By following these dos and don’ts of contouring and highlighting, individuals can enhance their natural features and achieve a flawless, sculpted appearance.
Contouring and Highlighting: Dos and Donts to Enhance Your Features
Contouring and highlighting are essential techniques for enhancing your natural features and creating a sculpted, radiant look. However, mastering these techniques requires a good understanding of the dos and don’ts to achieve the desired results. When it comes to contouring and highlighting, it’s important to consider your face shape, skin tone, and the products you use.
Firstly, the dos of contouring and highlighting include understanding your face shape to determine where to contour and highlight. For instance, if you have a round face, sculpting along the jawline and cheekbones can create a more defined look. Additionally, do blend your contour and highlight products seamlessly to avoid harsh lines and create a natural finish. It’s also important to use the right shades for your skin tone to ensure a flattering result.
On the other hand, there are certain don’ts to keep in mind when contouring and highlighting. One common mistake is using contour shades that are too dark, resulting in a harsh and unnatural appearance. Over-highlighting can also lead to an overly shiny or greasy look, so it’s important to use highlighter strategically. Furthermore, avoid using shimmery products for contouring, as they can make areas appear larger rather than creating a sculpted effect.
When enhancing your features through contouring and highlighting, remember to start with a light hand and build up the product gradually. By following these dos and don’ts, you can elevate your makeup game and achieve a beautifully contoured and highlighted look that enhances your unique features.